Fuzzy Little Monster

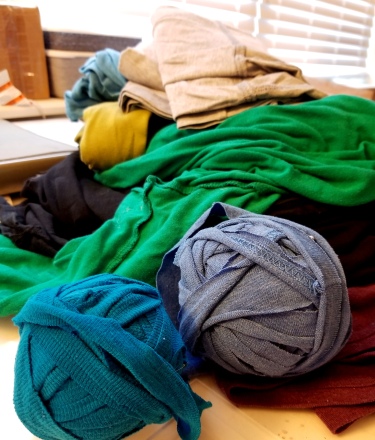
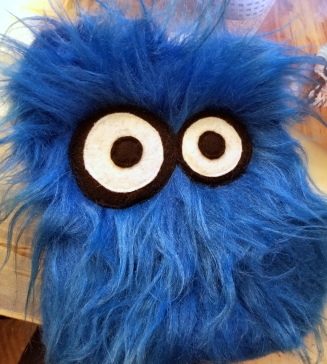
I’m always on the look out for new projects and, occasionally, people clearing out their own craft stashes will ask if I have any use for things they’re wanting to unload. This is how I inherited a bag of fuzzy fabric. Most of it was just remnants, however, a bit of the blue looked like it might have been a muppet at one time; it even had ping-pong eyeballs. So, it seemed fitting that the blue fabric become a monster again!

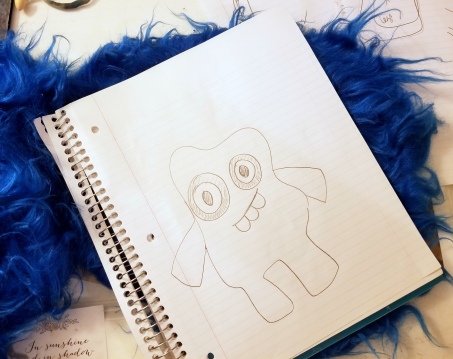
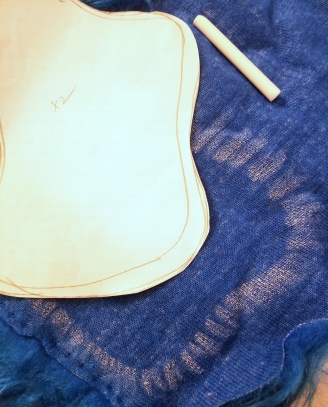
I sketched up a plan and, looked up a few tutorials online for help and for inspiration, and set to work! I used chalk to mark the patterns on the back of the fabric.

Next step was to put on a face. I wanted a cheery, silly face with big eyes. I think it turned out pretty close to my sketch!

Originally, I had thought to make the arms and legs fuzzy too. However, I couldn’t get the hair to lay the way I liked and turning the thick cloth right-side-out was rough. So, I switched course and opted to use some different fabric for the arms and legs – cute and floral, and much easier to work with. Then it was time to put it all together!

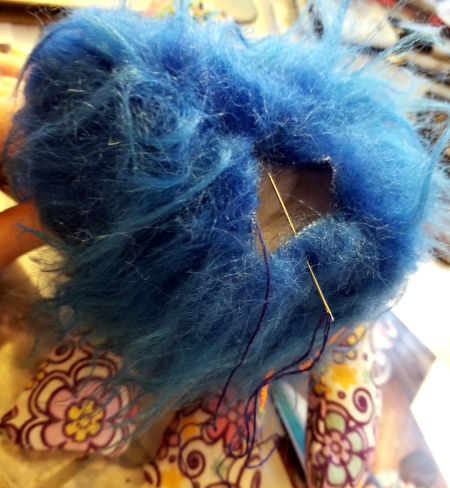
Stuffing the body and sewing up the head felt a little like brain surgery. I can understand now why doctors shave people’s heads for the process! However, I managed to get it closed up and voila!
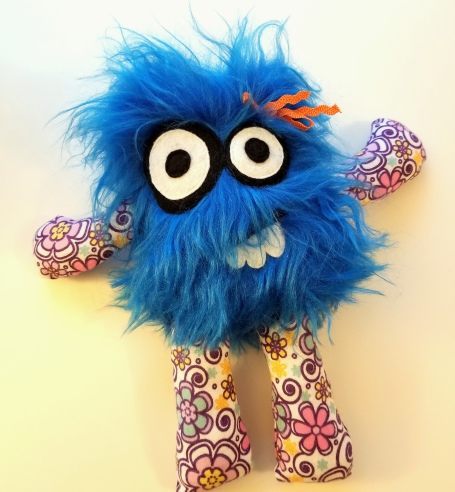
So cute!!

This being my first time making  monster and also using fuzzy fabric, I did learn a few things about working with these new materials. Still, I love how this cutie turned out and I’m excited to try again very soon!

Plus, everything was recycled or repurposed! Cute and eco-friendly!

New Year’s Project

Nothing like a holiday break to bring out the creative juices!

When we first moved into our place, way back in 2014, I made a bunch of boxes to house our movie collection.

Over the last few years, our collection has grown. Also, our family games have encroached on the movies’ space in that cabinet.. and then, this past Christmas, Hubby got a bunch more movies. So, it was time to move our game controllers out of the last box in the cabinet and into a new home to make space for it all.

Since adding a new box to the full cabinet wasn’t an option, something else would have to be done. So, to the internet I went! Turns out there’s lots of inspiration out there. What I settled on was upcycling a basket from the dollar store.

Supplies:

  1. basket of the right size (from the dollar store)
  2. a roll of natural fiber rope (hardware store)
  3. fabric (from my craft stash)
  4. hot glue gun and glue (from my stash)

Somewhere, recently (probably Facebook), I saw a video of how to make a basket by wrapping rope around a cheap basket (or a cardboard box). This seemed just the thing! Sadly, I couldn’t find the video again so I did some searching and found a few tutorials that looked similar and I set to work.

It was all hot glue, all the way. I was really pleased with how much stability wrapping with rope added to the dollar store basket. Most tutorials suggested only wrapping as far as the rope would be visible. However, I opted to go all the way to the top so it’d be reinforced to the top (hopefully it’ll last a good long while!)

In the video, they had some kind of trick to cut and fit the fabric just right… however, I couldn’t find the exact directions I saw. The other tutorials suggested putting the outside fabric first and then add the lining, so that’s what I did.

I got it all put together, and only burned my fingers a little bit. Adding the lining after the outside fabric made it a little bulky along the inside, but not terribly so. Still, if I was doing it again, I’d try to get it all done with one piece of fabric. However, this is still a great little basket! I’m very happy with how it came out.

And it fits all our game controllers very nicely.

Wohoo! Upcycling, low-budget projects are always extra satisfying.

Sweet Sweet Camel

I enjoy wandering through my local thrift shops periodically to see if they have any treasures. Every now and then, I snatch up something extra special.. this camel was calling out to me, so home it came.

Apparently, its original use was a sugar bowl.. super cute, in and of itself. However, it was a little scuffed and sad looking and in great need of a makeover. I was happy to oblige.

I wasn’t great about taking pictures of the process.. but first, I painted the whole thing black. Immediately it made this camel more regal. Then, I went to work adding bright colors against the dark background. I love how well they pop!

Once I got the body done, it took me a little while to decide how to finish off the neck and face. Choices, choices. Do I add dots all the way up? Do I leave the face blank? Add a lot of detail? Only a little?

For this project, I used a combination of water based and acrylic based paint pens with extra fine tip. Then I sealed it all with a couple coats of varnish.

In the end, I added a few sparse details – keeping it simple around the head and eyes. I added some dots wrapping around the neck – and it was done!

I love it!

With such a stylin’ makeover, this sweet sweet camel could be any number of things, but I envision it making an excellent tiny planter.

One of a kind!

New Creations, New Skills!

A while back I read that donated clothes often don’t get resold here in the US, that they’re often shipped off to 3rd world countries, often disrupting their own textile production. So, I started looking for ways to reuse clothes first, versus donating them straight away.  I’ve made a couple sets of cleaning cloths, but then I read about a way to make yarn from t-shirts.. it looked intriguing, so I gave it a try!

It was actually quick and easy! I raided my stash of t-shirts and got to work. Turns out that the shirts made of 100% cotton work best for the yarn; it curls up nicely when you tug on it while rolling it into the ball while other blends, though still useful for yarn, don’t roll quite so nicely.

So, with all this yarn I needed a project to use it! Once upon a time, I tried crocheting.. I made a scarf for my dad. It was a little wobbly on the edges, but he still wears it from time to time.  This time around, I couldn’t find my crochet hook. My previous escapades was many years ago, and I probably gave it away somewhere along the line. However, unwilling to be daunted by a lack of tools, so I looked up tutorials on youtube for finger crocheting. I found several and watched them a bunch of times and managed to make it work!

The edges are still a little wobbly, but it’s perfect for using as my bathroom mat!

New Designs!

I just put up two new designs today. These designs have been in the works for a little while, but now they are both available in my shop!

The footprints design was one I made originally for a custom order. That one was blue feet on a gray onesie:

footprint template

footprints blue

For the second print, I went in a different direction and used a deep gray on a bright yellow shirt – so bright and fun!

DSC07340
tiny feet!!

The other design is a punny, math joke. I originally made it as a going away gift for my math teaching neighbor. But I loved it so much, I decided to add it to my shop too.

DSC07354.JPG